Home | Remco Eissing
A relatively new way of providing Azure Pipelines agents with private connectivity options inside an organization is through Managed DevOps. Managed DevOps allows you to create private connections to your Azure DevOps organization from within your virtual networks. This is done by creating a Managed DevOps resource in your subscription and linking it to your Azure DevOps organization. Once linked you can reach resources on the private network and secured with private endpoints.
When you get a new Azure subscription you have a default quota for how many VM’s / agent you can create. Whenever you need more you can request to increase your quota through the Azure portal. This is also the case for Managed DevOps. But when you are automating the deployment of your subscriptions, also known as subscription vending, you might want to provision a Managed DevOps resource as well. This of course leads to the question of how to request a quota increase for Managed DevOps through an API, as we don’t want to do this manually through the portal.
Checking the current quota
Before we request a quota increase we first need to check what our current quota is. This can be done through the API. In this case we will use Azure PowerShell to make a GET request to the usage API.
$response = Invoke-AzRestMethod -Method:Get -Uri 'https://management.azure.com/subscriptions/{subscriptionId}/providers/Microsoft.DevOpsInfrastructure/locations/{location}/usages?api-version=2024-04-04-preview'
$result = $response.Content | ConvertFrom-Json
$result.value | Select @{Name = "Family"; Expression = { $_.name.value}}, currentValue, limit
The result will be a table showing the current usage and limit for Managed DevOps pools. Within tis we can see the standardBSFamily where we have limit of 5 but currently 0 in use.
Family                           currentValue limit
------                           ------------ -----
...
standardBSFamily                            0     5
...
Requesting a quota increase
To request a quota increase we can make a PUT request to the Quota API. For the body of the request we need to specify the family we want to increase within the value, in the example this is standardBSFamily. Additionally we need to specify the new limit we want to have, in this case we will increase it to 10.
$putBody = '{
    "properties": {
      "limit": {
        "limitObjectType": "LimitValue",
        "value": "10"
      },
      "name": {
        "value": "standardBSFamily"
      }
    }
  }'
$putRequest = Invoke-AzRestMethod -Method:Put -Uri 'https://management.azure.com/subscriptions/{subscriptionId}/providers/Microsoft.DevOpsInfrastructure/locations/{location}/providers/Microsoft.Quota/quotas/{family}?api-version=2021-03-15-preview' -Payload $putBody
This is all that it would take to raise a quota increase request for Managed DevOps Pools. You can check the status of your request by making a GET request to the URI in the Location header of the response. So for example:
$quotaRequestStatus = Invoke-AzRestMethod -Method:Get -Uri $putRequest.Headers.Location.AbsoluteUri
$statusResult = $quotaRequestStatus.Content | ConvertFrom-Json
$statusResults
Conclusion
With this simple API call you would be able to request a quota increase for Managed DevOps Pools in your subscription. This is especially useful when you are automating subscription vending and want to ensure that this can be done without manual intervention.
A popular way to utilize secrets stored in Key Vault within an App Service is by utilizing a Key Vault reference in the configuration of the App Service. This allows you to create an app setting with a name of ExampleSecret and then specify a value that points to a secret stored in Key Vault @Microsoft.KeyVault(SecretUri=https://kv-kvreference.vault.azure.net/secrets/example-secret). In your web application you can then simply fetch the value of ExampleSecret and you have the actual secret from Key Vault. For more details and introduction on Key Vault references: Use Key Vault references as app settings in Azure App Service and Azure Functions
Initial configuration
In order for the App Service to fetch the secret from Key Vault it would need to have access. This is typically done by having a System Assigned Managed Identity on the App Service. You can then provide this identity access to read secrets from Key Vault. A personal preference is to use the Azure Role-Based Access Control option, an example would look something like this:
resource keyVault 'Microsoft.KeyVault/vaults@2023-02-01' = {
  name: 'kv-${solutionName}'
  location: location
  properties: {
    sku: {
      family: 'A'
      name: 'standard'
    }
    tenantId: subscription().tenantId
    enableRbacAuthorization: true
    enabledForDeployment: true
  }
}

resource appServicePlan 'Microsoft.Web/serverfarms@2022-09-01' = {
  name: 'asp-${solutionName}'
  location: location
  sku: {
    name: 'F1'
    tier: 'Free'
    size: 'F1'
    capacity: 1
  }
}

resource webApp 'Microsoft.Web/sites@2022-09-01' = {
  name: 'web-${solutionName}'
  location: location
  properties: {
    serverFarmId: appServicePlan.id
    httpsOnly: true
  }
  identity: {
    type: 'SystemAssigned'
  }
}

resource keyVaultSecretReadAccess 'Microsoft.Authorization/roleAssignments@2022-04-01' = {
  name: guid(webApp.id, 'Key Vault Secrets Reader')
  properties: {
    roleDefinitionId: resourceId('Microsoft.Authorization/roleDefinitions', '4633458b-17de-408a-b874-0445c86b69e6') // Key Vault Secrets User
    principalId: webApp.identity.principalId
  }
}
Within the Key Vault you can then store a secret named example-secret. Within a .NET web application you could then refer to it using _configuration["ExampleSecret"] as the setting on the App Service is called ExampleSecret. This would make you web application look like this:
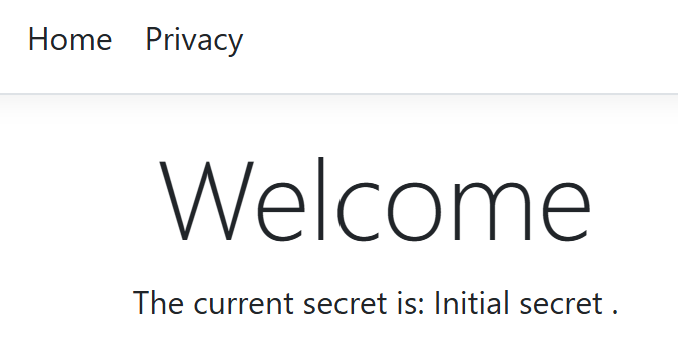
Updating the secret to a new value
Now it’s time to change the value of our secret, let’s update it to Updated super secret value. When you now refresh our web application you still see the initial value. That wasn’t really the plan…
You now have the option to wait till the secret gets updated somewhere within the 24-hour window. Alternatively you could make a call to https://management.azure.com/[Resource ID]/config/configreferences/appsettings/refresh?api-version=2022-03-01 to refresh the secrets. That already sounds a lot better! To make it easy you would typically call this using either Invoke-AzRestMethod in PowerShell or az rest in Azure CLI. This way you don’t have to deal with authentication yourself.
Invoke-AzRestMethod -Method:POST -Uri https://management.azure.com/subscriptions/[subscription id]/resourceGroups/rg-kv-reference/providers/Microsoft.Web/sites/web-kvreference/config/configreferences/appsettings/refresh?api-version=2022-03-01
az rest --method POST --url /subscriptions/[subscription id]/resourceGroups/rg-kv-reference/providers/Microsoft.Web/sites/web-kvreference/config/configreferences/appsettings/refresh?api-version=2022-03-01
After executing this you get back a response summarizing which secrets have been refreshed and if this was successful:
{
  "id": null,
  "nextLink": null,
  "value": [
    {
      "id": "/subscriptions/[subscription id]/resourceGroups/rg-kv-reference/providers/Microsoft.Web/sites/web-kvreference/config/configreferences/appsettings/ExampleSecret",
      "location": "Sweden Central",
      "name": "ExampleSecret",
      "properties": {
        "activeVersion": null,
        "details": "Reference has been successfully resolved.",
        "identityType": "SystemAssigned",
        "reference": "@Microsoft.KeyVault(SecretUri=https://kv-kvreference.vault.azure.net/secrets/example-secret)",
        "secretName": "example-secret",
        "status": "Resolved",
        "vaultName": "kv-kvreference"
      },
      "type": "Microsoft.Web/sites/config/configreferences"
    }
  ]
}
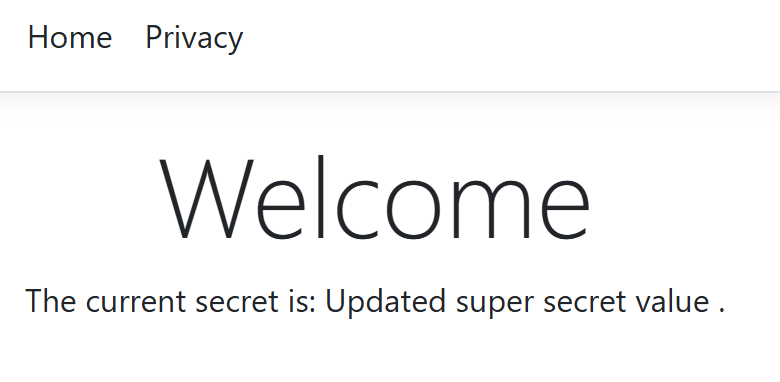
When you now refresh your web application you will get the updated value:
Conclusion
This way you can tell your App Service to refresh the secrets when you update them in Key Vault. This is beneficial for systems that use a single secret at a time. If you for example have a primary key and a secondary key you can safely wait for the 24-hour rollover period. Whenever that’s not the case you now have an Azure CLI and Azure PowerShell command to force the refresh, we could of course embed this inside of a GitHub Actions workflow or Azure Pipelines.
Recently got the question on how to enable certain environment settings in Microsoft Defender for Cloud. This post will be targeted at enabling the vulnerability assessment for machines feature and assumes that Defender for Servers itself is already enabled. In Azure this is managed via the Microsoft.Security/serverVulnerabilityAssessmentsSettings resource. This resource is used to enable the Vulnerability Management of Defender for Servers on Azure. This is a great way to ensure that you gain valuable insights on the vulnerabilities applicable to your servers and ensure they are protected against the latest threats.
When we look at the documentation of this resource it already describes a name, kind and a properties object with the selected provider. This selected provider also includes the example of MdeTvm as required value. Making it clear that this is the only value that we can currently pick.
Before running the deployment:

Bicep example
If we would put this in a Bicep template, this would look like this:
targetScope = 'subscription'

resource serverVulnerabilityAssessmentsSettings 'Microsoft.Security/serverVulnerabilityAssessmentsSettings@2023-05-01' = {
  name: 'AzureServersSetting'
  kind: 'AzureServersSetting'
  properties: {
    selectedProvider: 'MdeTvm'
  }
}
There are a couple of things to note from this Bicep template; one of the first things is the targetScope that is set to subscription. This is because the Vulnerability Management of Defender for Servers is a subscription level resource. The second thing to note is the kind and name that is set to AzureServersSetting. This is the kind that is used for the Vulnerability Management of Defender for Servers. With this template in hand all that we have to do is utilize New-AzSubscriptionDeployment -name 'va' -TemplateFile .\vulnerabilityAssessment.bicep -Location 'westeurope' to deploy it to our subscription.
After running the deployment:

Conclusion
So there we have it. When we now deploy this against our subscription we have enabled the Vulnerability Management of Defender for Servers on Azure. This is a great way to ensure that all your servers are protected against the latest threats.
Recently got the question on how to enable certain environment settings in Microsoft Defender for Cloud. This post will be targeted at enabling the Azure Policy for Kubernetes feature and assumes that Defender for Containers itself is already enabled.
When we enable this in Azure what will happen under the hood is that two extra policies will be assigned at the subscription level. The two policy definitions are ‘Deploy Azure Policy Add-on to Azure Kubernetes Service clusters’ and ‘Configure Azure Arc enabled Kubernetes clusters to install the Azure Policy extension’. But as we work with code we typically use the definition id’s, which are a8eff44f-8c92-45c3-a3fb-9880802d67a7 and 0adc5395-9169-4b9b-8687-af838d69410a.
Before running the deployment:

Bicep example
Putting this into a Bicep template is just like any other Policy Assignment that we create. However we keep the names and as these are deploy if not exists policies we also assign a System Managed Identity to the policy, without it we cannot deploy. If we would put this in a Bicep template, this would look like this:
targetScope = 'subscription'

resource azurePolicyKubernetesArc 'Microsoft.Authorization/policyAssignments@2024-04-01' = {
  name: 'Defender for Containers provisioning Policy extension for Arc-e'
  location: deployment().location
  properties: {
    displayName: 'Configure Azure Arc enabled Kubernetes clusters to install the Azure Policy extension'
    description: 'Deploy Azure Policy\'s extension for Azure Arc to provide at-scale enforcements and safeguard your Arc enabled Kubernetes clusters in a centralized, consistent manner. Learn more at https://aka.ms/akspolicydoc.'
    policyDefinitionId: '/providers/Microsoft.Authorization/policyDefinitions/0adc5395-9169-4b9b-8687-af838d69410a'
    parameters: {
      effect: {
        value: 'DeployIfNotExists'
      }
    }
  }
  identity: {
    type: 'SystemAssigned'
  }
}

resource azurePolicyKubernetes 'Microsoft.Authorization/policyAssignments@2024-04-01' = {
  name: 'Defender for Containers provisioning Azure Policy Addon for Kub'
  location: deployment().location
  properties: {
    displayName: 'Deploy Azure Policy Add-on to Azure Kubernetes Service clusters'
    description: 'Use Azure Policy Add-on to manage and report on the compliance state of your Azure Kubernetes Service (AKS) clusters. For more information, see https://aka.ms/akspolicydoc.'
    policyDefinitionId: '/providers/Microsoft.Authorization/policyDefinitions/a8eff44f-8c92-45c3-a3fb-9880802d67a7'
    parameters: {
      effect: {
        value: 'DeployIfNotExists'
      }
    }
  }
  identity: {
    type: 'SystemAssigned'
  }
}
After running the deployment:

Permissions
When we enable Azure Policy addon for Kubernetes via the portal you would see that it does not only create just plain Azure Policy assignments but also provides the identity the following role based permissions:
- Defender Kubernetes Agent Operator
- Kubernetes Agent Operator
- Log Analytics Contributor
So if we want to deploy this properly we should ensure that we grant these roles as well. We could extend the Bicep file with two additional resources that loop over an array of these 3 role definitions. As an alternative a module would also be a possibility, but for the simplicity of the example lets use two resources.
var roleDefinitions = [
  '8bb6f106-b146-4ee6-a3f9-b9c5a96e0ae5'
  '5e93ba01-8f92-4c7a-b12a-801e3df23824'
  '92aaf0da-9dab-42b6-94a3-d43ce8d16293'
]

resource arcRoleAssignments 'Microsoft.Authorization/roleAssignments@2022-04-01' = [for roleDefinition in roleDefinitions: {
  name: guid(roleDefinition, 'defender for containers arc')
  properties: {
    principalId: azurePolicyKubernetesArc.identity.principalId
    roleDefinitionId: '/providers/Microsoft.Authorization/roleDefinitions/${roleDefinition}'
    principalType: 'ServicePrincipal'
  }
}]

resource azurePolicyRoleAssignments 'Microsoft.Authorization/roleAssignments@2022-04-01' = [for roleDefinition in roleDefinitions: {
  name: guid(roleDefinition, 'defender for containers')
  properties: {
    principalId: azurePolicyKubernetes.identity.principalId
    roleDefinitionId: '/providers/Microsoft.Authorization/roleDefinitions/${roleDefinition}'
    principalType: 'ServicePrincipal'
  }
}]
Conclusion
When we combine the policy assignments and role assignments together we have successfully enabled the Azure Policy for Kubernetes feature of Defender for Containers. With this it has become possible to report and enforce the compliance of our Kubernetes clusters.
The full template I’ve used:
targetScope = 'subscription'

var roleDefinitions = [
  '8bb6f106-b146-4ee6-a3f9-b9c5a96e0ae5'
  '5e93ba01-8f92-4c7a-b12a-801e3df23824'
  '92aaf0da-9dab-42b6-94a3-d43ce8d16293'
]

resource azurePolicyKubernetesArc 'Microsoft.Authorization/policyAssignments@2024-04-01' = {
  name: 'Defender for Containers provisioning Policy extension for Arc-e'
  location: deployment().location
  properties: {
    displayName: 'Configure Azure Arc enabled Kubernetes clusters to install the Azure Policy extension'
    description: 'Deploy Azure Policy\'s extension for Azure Arc to provide at-scale enforcements and safeguard your Arc enabled Kubernetes clusters in a centralized, consistent manner. Learn more at https://aka.ms/akspolicydoc.'
    policyDefinitionId: '/providers/Microsoft.Authorization/policyDefinitions/0adc5395-9169-4b9b-8687-af838d69410a'
    parameters: {
      effect: {
        value: 'DeployIfNotExists'
      }
    }
  }
  identity: {
    type: 'SystemAssigned'
  }
}

resource arcRoleAssignments 'Microsoft.Authorization/roleAssignments@2022-04-01' = [for roleDefinition in roleDefinitions: {
  name: guid(roleDefinition, 'defender for containers arc')
  properties: {
    principalId: azurePolicyKubernetesArc.identity.principalId
    roleDefinitionId: '/providers/Microsoft.Authorization/roleDefinitions/${roleDefinition}'
    principalType: 'ServicePrincipal'
  }
}]

resource azurePolicyKubernetes 'Microsoft.Authorization/policyAssignments@2024-04-01' = {
  name: 'Defender for Containers provisioning Azure Policy Addon for Kub'
  location: deployment().location
  properties: {
    displayName: 'Deploy Azure Policy Add-on to Azure Kubernetes Service clusters'
    description: 'Use Azure Policy Add-on to manage and report on the compliance state of your Azure Kubernetes Service (AKS) clusters. For more information, see https://aka.ms/akspolicydoc.'
    policyDefinitionId: '/providers/Microsoft.Authorization/policyDefinitions/a8eff44f-8c92-45c3-a3fb-9880802d67a7'
    parameters: {
      effect: {
        value: 'DeployIfNotExists'
      }
    }
  }
  identity: {
    type: 'SystemAssigned'
  }
}

resource azurePolicyRoleAssignments 'Microsoft.Authorization/roleAssignments@2022-04-01' = [for roleDefinition in roleDefinitions: {
  name: guid(roleDefinition, 'defender for containers')
  properties: {
    principalId: azurePolicyKubernetes.identity.principalId
    roleDefinitionId: '/providers/Microsoft.Authorization/roleDefinitions/${roleDefinition}'
    principalType: 'ServicePrincipal'
  }
}]
As part of Azure DevOps the Azure Pipelines allow you to run automated builds and deployments for your applications. You can use different types of agents to run your pipelines, such as hosted agents, self-hosted agents, or virtual machine scale sets. Agents are grouped into agent pools, which define the configuration and capabilities of the agents. Agent pools are associated with agent pool queues, which are used to assign work to the agents in the pool.
Sometimes, you may need to remove an agent pool queue from an Azure DevOps project, for example, if you know that the project cannot execute builds and deployments on Microsoft-hosted agents. This typically occurs when there are security requirements and the network is locked down. In this post, I will show you how to manually remove an agent pool queue from an Azure DevOps project, as well as how to use the Azure DevOps REST API to automate the process. I will also show you how to restore an agent pool queue using the Azure DevOps REST API, in case you need to undo the removal.
How to manually remove an agent pool queue from an Azure DevOps project
The manual method to remove an agent pool queue from an Azure DevOps project involves deleting the agent pool that is associated with the queue. This will also delete the queue from the project, but not from the organization. To do this, follow these steps:
- Log in to your Azure DevOps portal and navigate to the project that contains the agent pool queue that you want to remove.
- Go to Project settings > Pipelines > Agent pools.
- Hover over the agent pool you like to delete. You will see a delete button on the right and can click on it.
- You get a confirmation if you want to delete the queue from the project. Confirm it if you are sure.
- Refresh the page and verify that the agent pool and the queue are no longer listed in the project.
Note that this method will delete the agent pool and the queue from the project, if required you can of course add it back again.
How to remove an agent pool queue from an Azure DevOps project using the Azure DevOps REST API
The Azure DevOps REST API allows you to programmatically interact with Azure DevOps services, such as projects, pipelines, agents, and queues. You can use the Azure DevOps REST API to remove an agent pool queue from an Azure DevOps project without deleting the agent pool. To do this, you will need to use the following endpoints:
- GET https://dev.azure.com/{organization}/_apis/distributedtask/queues?api-version=6.0-preview.1 to get the list of agent pool queues in the organization and their IDs.
- DELETE https://dev.azure.com/{organization}/_apis/distributedtask/queues/{queueId}?api-version=6.0-preview.1 to delete the agent pool queue from the organization.
To use the Azure DevOps REST API, you will need to authenticate with an access token or a personal access token (PAT). However, for security reasons, I recommend using the Get-AzAccessToken cmdlet from the Az.Accounts module to get an access token for Azure DevOps. This cmdlet will use the credentials of the current Azure session to generate an access token that can be used to call the Azure DevOps REST API. To use the Get-AzAccessToken cmdlet, you will need to connect to your Azure account that contains your Azure DevOps organization. Once you have connected to your Azure account, you can use the Get-AzAccessToken cmdlet to get an access token for Azure DevOps. To do this, run the following command in PowerShell: $token = Get-AzAccessToken -ResourceUrl 499b84ac-1321-427f-aa17-267ca6975798. Where 499b84ac-1321-427f-aa17-267ca6975798 is the well known guid of Azure DevOps. I do the same in the below example script.
In the below script I first get the access token for Azure DevOps using the Get-AzAccessToken cmdlet. Then I use the access token to call the Azure DevOps REST API to get the list of agent pool queues in the organization. I filter the list of queues by name to find the queue that I want to remove. If the queue is present, I get its ID and use it to call the DELETE endpoint to remove the queue from the organization. Here is the complete script in PowerShell:
$organization = 'your-organization-name'
$project = 'your-project-name'
$queueName = 'Azure Pipelines'

# Get access token for Azure DevOps
$accessToken = Get-AzAccessToken -ResourceUrl '499b84ac-1321-427f-aa17-267ca6975798'

$headers = @{
    Authorization = "Bearer $($accessToken.Token)"
    Accept        = 'application/json'
}

$getQueuesParameters = @{
    Method  = 'Get'
    Uri     = "https://dev.azure.com/$organization/$project/_apis/distributedtask/queues?queueNames=$queueName&api-version=7.2-preview.1"
    Headers = $headers
}

$getQueuesResponse = Invoke-RestMethod @getQueuesParameters

if ($getQueuesResponse.count -eq 1) {
    $queueId = $getQueuesResponse.value[0].id

    $removeParameters = @{
        Method  = 'Delete'
        Uri     = "https://dev.azure.com/$organization/$project/_apis/distributedtask/queues/$queueId/?api-version=7.2-preview.1"
        Headers = $headers
    }

    $response = Invoke-RestMethod @removeParameters

    Write-Host 'Queue deleted'
} else {
    Write-Host 'Queue not present'
}
How to restore an agent pool queue to an Azure DevOps project using the Azure DevOps REST API
If you accidentally deleted an agent pool queue from an Azure DevOps project or organization, you can use the Azure DevOps REST API to restore it. To do this, you will need to use the following endpoints:
- GET https://dev.azure.com/{organization}/_apis/distributedtask/queues?api-version=6.0-preview.1 to get the list of agent pool queues in the organization and their IDs.
- GET https://dev.azure.com/{organization}/_apis/projects?api-version=6.0 to get the list of projects in the organization and their IDs.
- POST https://dev.azure.com/{organization}/_apis/distributedtask/queues?api-version=6.0-preview.1 to create a new agent pool queue in the organization and associate it with a project.
In the script below I first get the access token for Azure DevOps using the Get-AzAccessToken cmdlet. Then I use the access token to call the Azure DevOps REST API to get the list of agent pool queues in the organization. I filter the list of queues by name to find the queue that I want to restore. If the queue is present, I get its ID and use it to call the POST endpoint to create a new agent pool queue in the organization and associate it with a project. Here is the complete script in PowerShell:
$organization = 'your-organization-name'
$project = 'your-project-name'
$poolName = 'Azure Pipelines'

# Get access token for Azure DevOps
$accessToken = Get-AzAccessToken -ResourceUrl '499b84ac-1321-427f-aa17-267ca6975798'

$headers = @{
    Authorization = "Bearer $($accessToken.Token)"
    Accept        = 'application/json'
    "Content-Type"  = 'application/json'
}

$getPoolParameters = @{
    Method  = 'Get'
    Uri     = "https://dev.azure.com/$organization/_apis/distributedtask/pools?poolName=$queueName&api-version=7.2-preview.1"
    Headers = $headers
}

$getPoolResponse = Invoke-RestMethod @getPoolParameters

if ($getPoolResponse.count -eq 1) {
    $poolId = $getPoolResponse.value[0].id

    $body = @{
        Name = $poolName
        Pool = @{
            Id = $poolId
        }
    }

    $addParameters = @{
        Method  = 'Post'
        Uri     = "https://dev.azure.com/$organization/$project/_apis/distributedtask/queues?api-version=7.2-preview.1"
        Headers = $headers
        Body    = $body | ConvertTo-Json
    }

    $response = Invoke-RestMethod @addParameters

    Write-Host 'Queue added'
} else {
    Write-Host 'Pool not found'
}
You can verify that the agent pool queue is restored to the project by using the GET endpoint again or by going to Project settings > Pipelines > Agent pools in the Azure DevOps portal.
Conclusion
In this post, I showed you how to remove and restore an agent pool queue from an Azure DevOps project using manual and automated methods. I hope that this guide will help you to manage your agent pool queues more easily and efficiently and above all to ensure that your project meets your compliance requirements.
Personal Access Tokens (PATs) are a way of authenticating and accessing Azure DevOps resources without using a username and password. They can be scoped to limit the access level and duration of the token, and they can be revoked at any time. However, PATs also pose a security risk if they are not managed properly, especially if they have full scope permissions.
Full scope PATs grant unrestricted access to all Azure DevOps organizations, projects, and resources that the user has access to. This means that anyone who obtains a full scope PAT can potentially perform any action on behalf of the user, such as deleting repositories, modifying pipelines, accessing secrets, and so on. Full scope PATs should only be used for specific scenarios where no other scope is sufficient, and they should be treated with extreme caution.
Azure DevOps offers the possibility to authenticate processes using a Managed Identity or Service Principal. This reduces the need for running automation processes with a PAT token.
How to prevent these from being created?
Even though using Managed Identity or Service Principal is a recommended practice, there might be scenarios where using a PAT token is necessary or more convenient. In that case, it is important to restrict the scope and duration of the PAT token as much as possible, to reduce the risk of unauthorized access or misuse.
One way to restrict PAT tokens is by applying policies in Azure DevOps / Microsoft Entra ID. Policies can help enforce certain rules or standards for creating and using PAT tokens, such as:
- Require a maximum lifetime for PAT Personal Access Tokens
- Restrict creation of global Personal Access Tokens
- Restrict creation of full-scoped Personal Access Tokens
To apply policies for Personal Access Tokens, you need to have an organization associated to Microsoft Entra ID. And as user doing the configuration you need to have been assigned the Azure DevOps Administrator role in Microsoft Entra ID. If that’s all in place you can go to the organization settings and navigate to Microsoft Entra.
Keep in mind that these policies will only apply to newly created PATs, so any existing PATs will remain unaffected.
How to list all full scope PATs?
One way to list all the full scope PATs in your organization is to use a PowerShell script that can query the Azure DevOps API. The script will require an administrator to run it. Luckily we don’t need to have a PAT to authenticate and access the data, instead we can use an Access Token.
This script will fetch all users and query foreach user if they have any PAT, if they do it will validate the scope of the token. If the scope matches it will write an entry to the results. So all the results will be users with a full scope PAT. If there is no value for targetAccounts it’s even worse, this means that the PAT is valid for all organizations that the user belongs to.
param(
    [String]
    $OrganizationName,

    [String]
    $TenantId,

    [String]
    $Scope = 'app_token'
)

$AccessToken = Get-AzAccessToken -ResourceUrl "499b84ac-1321-427f-aa17-267ca6975798" -TenantId $TenantId
$Headers = @{
    Accept = "application/json"
    Authorization = "Bearer $($accessToken.Token)"
}

function GetUsers
{
    $UsersUrl = "https://vssps.dev.azure.com/$OrganizationName/_apis/graph/users?subjectTypes=aad&api-version=7.2-preview.1"
    $UsersResult = Invoke-RestMethod -Method:Get -Uri $UsersUrl -Headers $Headers

    return $UsersResult.value
}

$Users = GetUsers
$FilteredUsers = $Users | Where-Object {$_.domain -eq $TenantId}

$Results = @()

foreach($User in $FilteredUsers)
{
    $PatUrl = "https://vssps.dev.azure.com/$OrganizationName/_apis/tokenadmin/personalaccesstokens/$($User.descriptor)?api-version=7.1-preview.1"
    $PatResult = Invoke-RestMethod -Method:Get -Uri $PatUrl -Headers $Headers

    if ($null -eq $PatResult.value -or $PatResult.value.Length -le 0)
    {
        Write-Verbose "No PAT found for $($User.displayName)"
    }
    else
    {
        $PatResult.value | Where-Object {$_.scope -eq $Scope} | ForEach-Object {
            Write-Verbose "PAT found for $($User.displayName) with scope $($_.scope)"

            $Results += [PSCustomObject] @{
                User = $User.displayName
                Scope = $_.scope
                TargetAccounts = $_.targetAccounts
                ExpirationDate = $_.validTo
            }
        }
    }
}

$Results | Format-Table
The script will generate an output like this:
User  Scope     TargetAccounts ExpirationDate
----  -----     -------------- --------------
alice app_token {some guid}    1/14/2024 12:00:00 AM
alice app_token                1/14/2024 12:00:00 AM
Conclusion
In this document, I have shown you how to list all the full scope PATs in your organization using a PowerShell script and the Azure DevOps API. This can help you identify and revoke any unnecessary or risky tokens that could compromise your security. I have also taught you how to limit the scope of a PAT, and why this is crucial to protect your data and resources. I recommend that you review your PATs regularly and follow the best practices for creating and managing them. By doing so, you can enhance the security and compliance of your Azure DevOps environment.
When we run our solution in Azure there will always be a time where there is an incident or maintenance event. As we are responsible for hosting our solutions we should get updates on these events so that we can take the right actions. One way that Azure provides these kind of notifications is through the use of Service Health. I quite regularly run into workloads that haven’t yet set this up and then experience challenges because they miss the events that have been published. This can of course be configured manually, but this will have to be done per subscription or resource group and thus it can be easy to miss.
How to deploy this at scale?
The obvious answer for this is typically Azure Policies. They can stay around and as new subscriptions get added to the environment they will configure Service Health alerts as well. Luckily the Azure Community Policy already contains Deploy Service Health Alerts and corresponding Action Group to notify of Service Health Incidents. When we enable this policy it will create an Action Group per subscription and setup Service Health alerts attached to it.
How to set unique receivers per subscription?
One of the challenges with the current policy is that you can assign it on a management group level and it will configure the same e-mail receivers for all subscriptions. In many organizations different subscriptions have different technical owners or engineers that are responsible for this. One way many of them already do this is by setting a tag on each subscription with this information. So how can we leverage this. If we look at the current policy it has a parameter emailAddress, within the deployment part of the policy definition this is used like this:
"emailAddress": {
    "value": "[parameters('emailAddress')]"
}
As we have set a tag TechnicalContact at the subscription level we could leverage this by altering this block to this:
"emailAddress": {
    "value": "[subscription().tags['TechnicalContact']]"
}
Once this policy gets remediated the service health alerts will be sent to the technical contact.
Conclusion
Setting up service health alerts is important to ensure workload teams don’t miss out on important service issue, maintenance events etc.. Missing these could result in very short and difficult planning for these events, or time spent troubleshooting an issue. So many reasons to ensure that this gets configured at scale, which can easily be done with an Azure Policy as shown in this post.
Azure Policy is a great way to enforce or assess if the configuration of Azure services within Azure environment is compliant with standards set by the organization. Policies can be utilized in many ways; of course there are the builtin policies that are available on the platform and can just be assigned. Of course builtin policies will not always cover each and every scenario and you often have to create your own custom policies as well.
What happens a lot is that an engineer creates a policy, tests it, fine tune’s it and then is done. A common use case is that we first do this in an isolated fashion on a single subscription or resource group level. When the engineer is happy it then gets applied onto a Management Group level for testing purposes. Which usually results in discovering some bugs, and after fixing those it will get applied to the production management group as well.
Most of the time there is some basic Infrastructure as Code and pieces of automation surrounding this. Design Azure Policy as Code workflows describes a nice proccess that creates a workflow covering the creation, testing and deployment of the Azure Policy. In this post I want to describe how such a proccess could look in practice by leveraging GitHub Actions for the automation. For the example we will create an Azure Policy that audits if there are undesired role assignments of type Owner on a subscription or resource group that has a certain tag.
Creating a policy repo
Obviously I would first need a GitHub repository, I usually start with a local git repo.
Creating a GitHub Actions workflow
When we create a GitHub Actions workflow we of course want to trigger it on a push into the main branch. And then we want to deploy the policies and apply the test assignments.
name: policy-deployment

on:
  push:
    branches:
      - main

jobs:
  apply-azure-policy:
    runs-on: ubuntu-latest
    name: Deploy policy definitions + test assignments
    steps:
    - name: Checkout
      uses: actions/checkout@v2
    - name: Login to Azure
      uses: azure/login@v1
      with:
        creds: $
        allow-no-subscriptions: true
    - name: Create or update Azure Policies
      uses: azure/manage-azure-policy@v0
      with:
        paths: |
          policies/rbac-owner/**
        assignments: |
          assign.test.*.json
The above workflow contains a single job that will apply the policy definition and apply all the assignments that are in files following the assign.test.*.json pattern. So a file with assign.dev.rbac-owner-disallowed.json will be applied, but the file named assign.prd.rbac-owner.json won’t get applied as it doesn’t match with the pattern.
Testing the policy
Most of the DevOps teams that I have met so far are testing these policies manually and test them for the change they want to make. Over the last years I’ve seen many of them experience regressions, where a change in the policy had a bunch of unintended side effects.
If we take these previous thoughts into consideration a DevOps process would facilitate some way of automated testing. For a policy that would mean a few things;
- For an audit policy we deploy resources that satisfy and that don’t satifsy the policy.
- A deny policy should be tested by trying to deploy resources and validate if they are really denied. But we also want to see a good resource go through succesfully.
- For a modify policy I like to see that it takes the right actions, but also that it doesn’t fiddle or conflict with valid deployments.
For all of these we would have to follow a similar process:
- Deploy Azure resources on which we want to test
- Run a Policy Compliance Scan
- Evaluate the output of the policy compliance scan.
For the rest of the example I will use an Audit policy. For the other policy types some of the test steps will be slightly different.
Deploying test resources
Deploying the test resources for me is usually a dedicated stage. This stage deploys a Bicep, ARM, Terraform template or any other mechanism that you like for creating these resources.
  deploy-test-resources:
    runs-on: ubuntu-latest
    name: Deploy test resources
    needs: apply-azure-policy
    steps:
    - name: Checkout
      uses: actions/checkout@v2
    - name: Login to Azure
      uses: azure/login@v1
      with:
        creds: $
    - name: Deploy
      uses: azure/arm-deploy@v1
      with:
        scope: subscription
        subscriptionId: $
        template: ./tests/deployment/rbac-owner.bicep
        region: westeurope
        failOnStdErr: false
Testing your policies
Now that we test resources deployed and our policy assigned we can take a look at testing our policy. Typically you would run a policy scan and then look at the output, but we will trigger this scan in the next step already. We will use the Azure/policy-compliance-scan action in GitHub. This will provide us with a CSV reporting the compliance of our resources. This CSV is great input for running some automated test cases against.
I could pick a number of testing frameworks out there, in this case I would leverage Pester; so would write it in PowerShell. My reasoning behind this is that most of the time policies are written and maintained by engineers that are already familiar with PowerShell.
Describe "Check disallowed resource group owners" {
    BeforeAll {
        $results = Import-Csv policy-compliance.csv
        $result = $results | Where-Object { $_.POLICY_DEF_ID.endswith('audit-rbac-owner') -and $_.POLICY_ASSG_ID.Contains('/resourcegroups/rg-disallowed-owner') }
    }

    It "Should have one result" {
        $result | Should -Not -BeNullOrEmpty
        $result.Count | Should -Be 1
    }

    It "Should be resource group rg-disallowed-owner" {
        $result.RESOURCE_ID.Contains('rg-disallowed-owners/providers/microsoft.authorization/') | Should -Be $true
    }

    It "Should be non compliant" {
        $result.COMPLIANCE_STATE | Should -Be 'NonCompliant'
    }
}
In the example above we run a validation on a single resource group in the describe. In the BeforeAll section we grab the results for this particular resource group, as we only want to validate that single resource group.
Then the different cases will be validating that our policy behaved as expected:
- We should only have a single entry for our policy for the single resource group. So we validate that the count of the results is
1.
- Validate that the resource id of the result is actually the resource that we expect.
- As the deployed resource should be non-compliant we validate the compliance state.
Automating the tests
Of course we can run all these steps using GitHub Actions.
  test-policy:
    runs-on: ubuntu-latest
    name: Test policies on resources
    needs:
      - apply-azure-policy
      - deploy-test-resources
    steps:
    - name: Login to Azure
      uses: azure/login@v1
      with:
        creds: $
    - name: Azure Policy Compliance Scan
      uses: Azure/policy-compliance-scan@v0
      continue-on-error: true
      with:
        scopes: |
          /subscriptions/$/resourceGroups/rg-disallowed-owners
        policy-assignments-ignore: |
          /subscriptions/$/providers/microsoft.authorization/policyassignments/*
        wait: true
        report-name: policy-compliance
    - name: Checkout
      uses: actions/checkout@v2
    - name: Download policy compliance artifact
      uses: actions/download-artifact@v2
      with:
        name: policy-compliance.csv
    - name: Test policy compliance results file
      shell: pwsh
      run: Test-Path policy-compliance.csv | Should -Be $true
    - name: Analyze policy compliance results
      shell: pwsh
      run: |
        Invoke-Pester ./tests/PolicyCompliance.Tests.ps1 -Passthru
Once that all the test have completed succesfully our policy should be consided safe to be promoted to production. As we already have the definition there it can be just a matter of assigning it to the next resources. In general I would prefer to do this at the Management Group level.
For assigning them I leverage another GitHub Actions Job. This job will just look at the assignments that are described in assign.prd.*.json. An example of such an assignment would be:
{
    "sku": {
     "name": "A0",
     "tier": "Free"
    },
    "properties": {
     "displayName": "No unknown RBAC owners allowed on subscription and resource groups",
     "policyDefinitionId": "/subscriptions/[subscriptionid]/providers/Microsoft.Authorization/policyDefinitions/audit-rbac-owner",
     "scope": "/subscriptions/[subscriptionid]",
     "notScopes": [],
     "parameters": {},
     "metadata": {
      "assignedBy": "Remco Eissing"
     },
     "enforcementMode": "Default"
    },
    "id": "/subscriptions/[subscriptionid]/resourceGroups/rg-disallowed-owners/providers/Microsoft.Authorization/policyAssignments/audit-rbac-owner",
    "type": "Microsoft.Authorization/policyAssignments",
    "name": "audit-rbac-owner",
    "location": "westeurope"
   }
The deployment job would look like below. After this job has ran it will have assigned the policies at the production scopes.
  assign-azure-policy-production:
    runs-on: ubuntu-latest
    name: Assign policy to production
    needs: test-policy
    steps:
    - name: Checkout
      uses: actions/checkout@v2
    - name: Login to Azure
      uses: azure/login@v1
      with:
        creds: $
        allow-no-subscriptions: true
    - name: Create or update Azure Policies
      uses: azure/manage-azure-policy@v0
      with:
        paths: |
          policies/**/**
        assignments: |
          assign.prd.*.json
Cleaning up
We’ve now seen how we can automatically test a policy and promote it to production. We of course want to be cost effective here as well; so we should clean up all our testing resources in an automated fashion. Using GitHub Actions this can be a simple extra job, that looks something like this:
  remove-test-resources:
    runs-on: ubuntu-latest
    name: Remove test resources
    needs: test-policy
    steps:
    - name: Checkout
      uses: actions/checkout@v2
    - name: Login to Azure
      uses: azure/login@v1
      with:
        creds: $
    - name: Remove
      uses: azure/CLI@v1
      with:
        azcliversion: 2.0.72
        inlineScript: |
          resources="$(az resource list --resource-group rg-policy-test | grep id | awk -F \" '{print $4}')"
          for id in $resources; do
              az resource delete --resource-group rg-policy-test --ids "$id" --verbose
          done
Conclusion
There is lots of room for improvement to learn from regular development processes when working with Azure Policies. This post is just meant as a first starter for some inspiration.
When working within your Azure environment you leverage Role Based Access Control, either on your Management Group, subscription, resource group or even on a resource level. Now due to a variety of reasons you eventually see a identity with the name Identity not found. So you now have a case where permissions are assigned to an identity that got removed; this typically happens in cases where users get removed from Azure Active Directory or for example a Managed Identity that got removed.
Why should I care?
Because it’s just so much nicer to work in an environment that’s clean, you are simply less distracted. Also Role Based Access Control has it’s limits just like many other things in Azure.
How can I find these identities?
You could of course look through all your subscriptions etc. within the Azure Portal to identify any assignments that are unknown and clean them up. But an easier job would be to leverage automation to identify these objects. My personal favorite for these tasks is leveraging the Az PowerShell cmdlets, and in this case Get-AzRoleAssignment specifically.
When we look at the documentation for this cmdlet it provides us with a nice clue on what we can leverage:
Please notice that this cmdlet will mark ObjectType as Unknown in output if the object of role assignment is not found or current account has insufficient privileges to get object type.
So with this new bit of knowledge we can now write a script to get all our unknown objects, which would typically look like:
Get-AzRoleAssignment | Where-Object {$_.ObjectType -eq 'Unknown'}
This will return all the objects with ObjectType of Unknown throughout the selected Azure subscription. So this includes all the assignments to resource group and resources as well.
How can I remove them?
That’s the easy part where Remove-AzRoleAssignment comes into play. And as it’s the case when working with PowerShell objects we can just pipe the output of the get command to our remove command. You probably want to do something like this in a loop and write some logging information for the cases where you need to read back what you actually removed and when.
How can we make this scale?
My personal favorite is to do this in a serverless way, so in my case I would leverage Azure Functions for executing this. It offers high scalability, reliability as well as many standard building blocks that I like to utilize. What our Function App needs to do:
- Get all subscriptions
- For each subscription get unknown role assignments. Log the assignment that it will remove and remove the actual assignment.
To run this the Function App needs to have a Managed Identity. The Managed Identity needs to have User Access Administrator rights on the subscriptions that it needs to clean.
I’ve opted to leverage PowerShell Durable Functions. I’ve opted for PowerShell as this is the language I see most people use for these kind of tasks, so that enables them to maintain it as well. For the durable functions I choose a fan out / fan in pattern.
It starts with the trigger and orchestrator. The orchestrator is rather simple; it invokes the GetSubscriptions activity and foreach subscription it invokes the RemoveUnknownAssignments activity and waits till all of them are completed.
GetSubscriptions connects to the Azure environment and will return all the subscriptions that the Managed Identity has access to.
RemoveUnknownAssignments selects the Azure subscription, fetches the unknown assignments and then removes them. This function also takes into account an Application Setting whatif; if this has a value of 1 then it will not process the actual removal but run in a log only mode.
Configuring the Managed Identity with Graph permissions
I configure the Function App with a System Assigned Managed Identity so that this can be leveraged for authentication against other Azure services. By default the Managed Identity doesn’t have any permissions to interact with the Microsoft Graph API, the API used for managing Azure Active Directory, so we need to provide those.
# Connecting to the graph and requesting the scope to assign app roles.
Connect-MgGraph -Scopes Directory.ReadWrite.All, AppRoleAssignment.ReadWrite.All

# Get the Managed Identity from AAD
$MSI = Get-MgServicePrincipal -Filter "DisplayName eq 'rbaccleaner'"

# Get Microsoft Graph application
$graphApp = Get-MgServicePrincipal -Filter "appId eq '00000003-0000-0000-c000-000000000000'"

# Get graph permission
$permission = $graphApp.AppRoles | Where-Object { $_.Value -eq "Directory.Read.All" }

# Assign the permission to the Managed Identity
New-MgServicePrincipalAppRoleAssignment -AppRoleId $permission.Id -PrincipalId $MSI.Id -ServicePrincipalId $MSI.Id -ResourceId $graphApp.Id
In my case I assigned Directory.Read.All, Directory.User.Read. Keep in mind that if you don’t have the right permissions set that all the role assignments will be marked as unknown and thus removed.
Repository
An example of the code can be found here: https://github.com/remcoeissing/azure-rbac-clean-ps
It currently doesn’t deploy any infrastructure components.
What’s next
In a future post will dive into the possibilities that we have available for doing this in an event driven fashion. That will feature a more direct approach where we don’t rely on scheduling anymore. But it leverages the same basis.
App Services in Azure make it easy to quickly spin up an environment where you can host a webapp or api, without having to manage the webserver yourself.
When running solution in the cloud the costs become very visible. This allows us to spend time optimizing the costs. One of the easiest way to reduce costs is by reducing the amount of waste. In a cloud we can define waste as resources that we pay for but are not utilizing anymore.
The case of the empty App Service Plans
If we apply this principle to App Services then one might think we can just remove the App Service when we are done with it. But many times I found Azure environments where the App Service was removed but the App Service Plan stayed around. The actual resource that you are getting billed for is the App Service Plan, so not removing that will mean you still incurr charges.
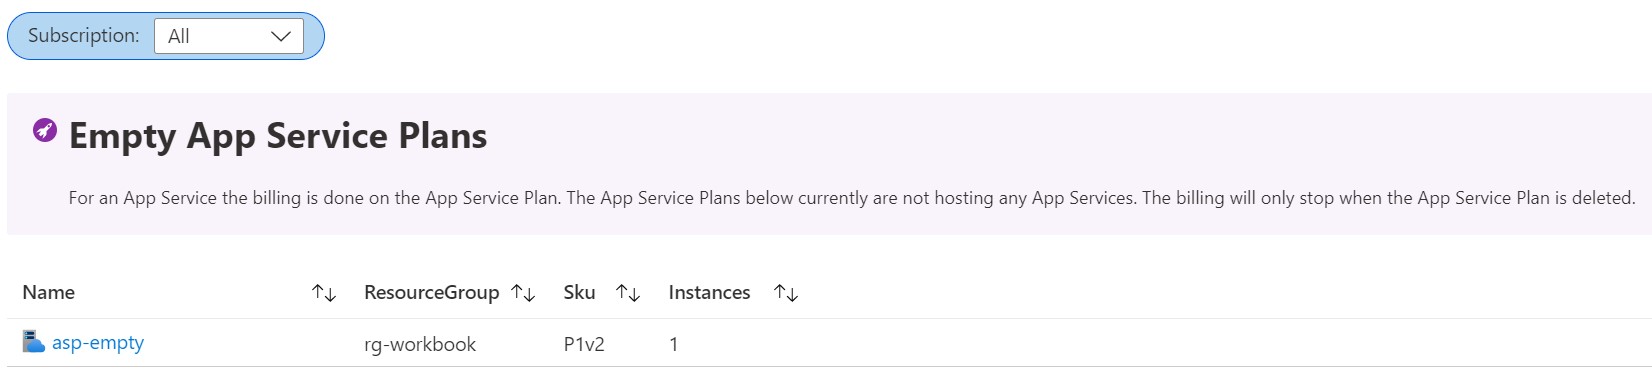
Luckily enough we can easily detect these kind of App Service Plans. My favorite method is by leveraging an Azure Resource Graph Query. Using this we can fetch all the App Service Plans that are hosting 0 sites. The below query will fetch all of these.
resources
| where type =~ 'Microsoft.Web/serverFarms'
| where properties.numberOfSites == 0
| project ResourceId = id, ResourceGroup = resourceGroup, Sku = tostring(sku.size), Instances = tostring(properties.currentNumberOfWorkers)
So when we look at the returned data you will most likely see some App Service Plans with a SKU of F1, this refers to the Free tier and does not incur any charges. For other tiers like for example P1v2 or S1 you do have to pay. The actual amount is also influenced by the number of instances. If we for example stick with a P1V2 and lookup the instance price on App Service Pricing page, this is currently 130.954 Euro’s a month per instance. So when we run 2 instances of this without any sites on there we are spending slightly over 260 Euro’s that we could have spent on something more useful.
The case of the cheaper App Service Plan tier
After eliminating waste on the App Service Plans that we use throughout the Azure environment we can also try to optimize the spend on the App Service Plans that we are actually utilizing. With the Premium tier there are 3 different versions. Newer versions are utilizing newer generations and have a different pricing model. For example if we have a P2v2 plan we would have 2 cores and 7 GB of RAM for around 262 Euros. If we would switch to a P1v3 plan we would get 2 cores and 8 GB of RAM for 222 Euros. And with the Premium v3 tier also comes the possibility of reserving capacity, with a 3-year reservation the price would go down to 133 Euro’s.
Changing from a Premium v2 tier to a Premium v3 tier depends on the availability. The steps for this migration can be found here: App Service Configure Premium tier
We can query these different types of App Service Plans using an Azure Resource Graph query and provide recommendations on which size to switch to.
resources
| where type =~ 'Microsoft.Web/serverFarms'
| where sku.size startswith 'P' and sku.size endswith 'v2'
| project Name = id, ResourceGroup = resourceGroup, Sku = tostring(sku.size), Instances = tostring(properties.currentNumberOfWorkers), RecommendedSku = iff(sku.size == 'P1v2', 'P1v3', iif(sku.size == 'P2v2', 'P1v3', 'P2v3'))
Monitoring for cost optimizations
Monitoring your environment to be cost effective and optimizing it’s cost is an ongoing effort. One way to do this is by leveraging a workbook in Azure Monitor that we can utilize for tracking the empty plans and plans where we can leverage a different size that would be more cost effective. In a perfect world the workbook would not display anything and show us that we’ve optimized the entire estate.
If you want to try out this workbook you can find it at App Service Cost Optimization GitHub Repo